
Zoom is one of the most popular webinar and video conferencing tools, with over 219,700 B2B users.
However, running Zoom meetings can be a tedious process. Especially if your schedule is crowded with back-to-back sessions.
Plus, each one will require a personal touch to start and manage.
Since efficiency is key in online events, automating Zoom meetings can save valuable time and reduce the administrative load.
Automation streamlines the entire process, from scheduling and sending out invites to managing follow-ups.
This way, you can focus on delivering engaging and productive meetings.
Let’s explore how to automate Zoom meetings so your online events run like clockwork–and provide a seamless experience for hosts and participants.
Ready to start automating your Zoom meetings now? Explore how AEvent can help!
How to Set Up Automated Zoom Meetings
The best way to set fully automated Zoom meetings that you can “set and forget” is by integrating Zoom with AEvent.
You can integrate Zoom with other tools to automate certain processes like sending emails and tracking leads.
However, AEvent allows you to do all these and more all in one platform.
Here’s how you can automate Zoom from start to finish:

Graphic: 7 Steps to Set Up Automated Zoom Meetings
- Open a Zoom Account
- Integrate Zoom with AEvent
- Upload Your Pre-Recorded Webinar
- Create Your Event Timeline
- Connect with Your Page Builder
- Schedule Your Zoom Meeting
- Automate Reminders and Emails
Step 1: Open a Zoom Account
Before you can automate your webinars on Zoom, you need to create a Zoom account if you haven’t already.
Zoom offers a variety of plans, tailored to fit different needs and scales of use. The free tier, known as Zoom Basic, is perfect for personal and smaller-scale meetings.
It can host up to 40 minutes of continuous meeting time with up to 100 participants. It’s a suitable option for those just starting with webinars or for casual use.
For more robust features, consider the Zoom Pro, Business, or Enterprise plans.
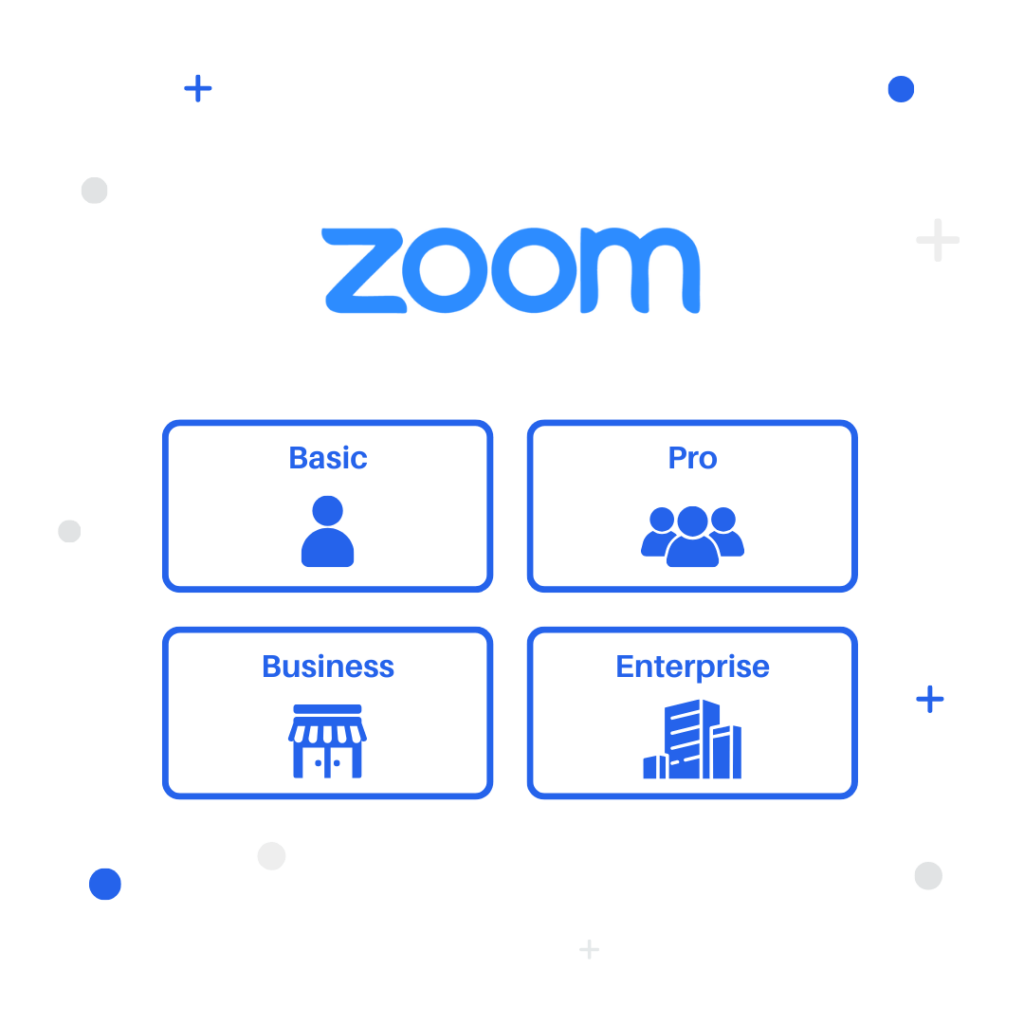
These come with added benefits such as increased meeting durations, extensive participant capabilities, admin feature controls, and advanced user management.
These plans are better for businesses and organizations that require more power and flexibility for their meetings.
When selecting your plan, consider the size of your audience, the frequency of your meetings, and any specific features you might need, like webinar capabilities, cloud recording, or company branding.
Each plan also offers a range of add-ons, from additional cloud storage to faster customer support.
This lets you customize your Zoom account to the exact demands of your webinar program.
Step 2: Integrate Zoom with AEvent
AEvent offers seamless integration with Zoom, creating a cohesive platform where you can manage all aspects of your meeting lifecycle.
With AEvent, you can tap into advanced automation features that go beyond basic scheduling.
You can set up intricate workflows for sending out reminders, follow-up emails, and even post-meeting surveys.
These tools are designed to keep your participants engaged before, during, and after the meeting.
AEvent’s flexibility means it can be integrated with other tools and platforms you might be using, such as CRM systems, marketing tools, and more.
You get a more unified system for managing all your business communication needs.
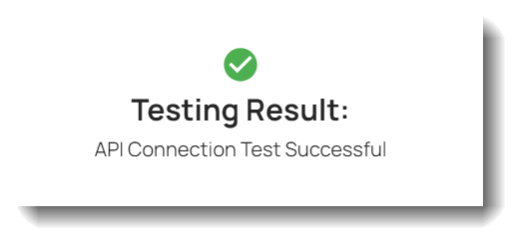
To add Zoom to your AEvent account, go to “Integrations” and click Add Integration. Search and select Zoom. Name your integration and click Add.

This will prompt you to a Zoom login page. Enter the Zoom account you wish to integrate with AEvent and click Allow on the pop-up.

You’ll know that the connection is successful when the ‘Test’ function shows a positive result.

Step 3: Upload Your Pre-Recorded Webinar
If you’re running a fully automatic webinar on Zoom, you need to upload the media you’re delivering to AEvent.
Open your AEvent account and click on ‘Upload Media.’ You’ll see a pop-up where you can upload your recording.
AEvent supports different file formats like .mp4, .wav, .m4a, and more.

The platform will transcode and prepare your new video so it’s ready for broadcast. Once complete, you’ll see a green check mark on that video asset.
If you haven’t prepared a recording yet, you can skip to the next step and upload your file later.
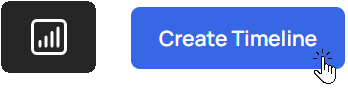
Step 4: Create Your Event Timeline
Creating your event timeline on AEvent is an important step for setting different actions before, during, and after your webinar.
Click on ‘Timelines’ on the left-side menu and select Create Timeline.
You can choose from 3 different user options depending on your experience level with AEvent. We recommend the Beginner level if you’re new to the platform.
This intuitive feature makes for easier navigation and management.
If you don’t choose a user level, the Advanced level will be pre-selected for you.

Step 5: Connect with Your Web Page Campaign
Before scheduling your Zoom webinar, you need to set up your landing pages.
AEvent integrates with your website and campaign at code-level so you can host automated Registration, Confirmation, and Replay Pages.
Our platform supports integrations with Unbounce, Groove Funnels, and ClickFunnels webinar pages.
You can add countdown timers, add-to-calendar options, and time zone options to increase audience engagement.
If you’re using other pages in your webinar funnel, AEvent also lets you track views and set up dynamic page elements.
Step 6: Schedule Your Zoom Event
Now that you have your timeline and funnel pages ready, you can schedule your Zoom event.
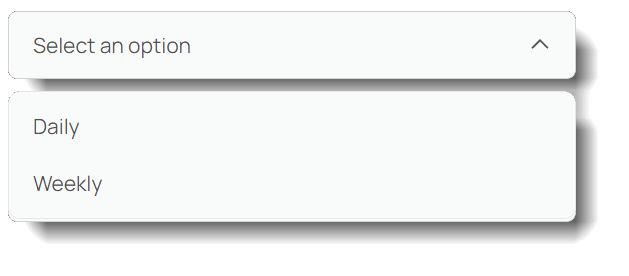
You can set it as a one-time event or a recurring webinar with daily and weekly sessions.

AEvent speeds up the scheduling process by letting you add co-hosts or panelists, define email/template settings, and arrange the event flow.
For an one-time event, go to your dashboard and click on ‘Schedule An Event.’ Select the timeline you are scheduling (see Step 4 for creating your event timeline).
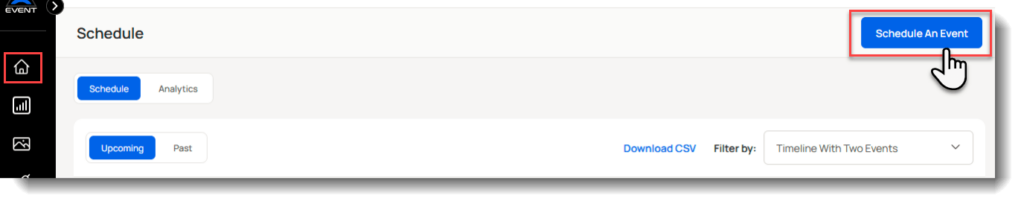
When you select a Zoom-based timeline, you’ll be prompted with a Delivery Application option. Select whether you want to schedule a Zoom Meeting or a Zoom Webinar.
Since this is a One Time event, leave the Type selector as is.

Select the date and time of your Zoom webinar and click ‘Schedule.’ Since AEvent is set to a default EST/NYC timezone, you can change the time zone in your Account settings.
For a recurring Zoom event, follow the same steps but select ‘Recurring.’ Then, choose the repetition mode you want to be scheduled – daily or weekly.
Step 7: Automate Reminders and Updates
AEvent lets you configure automatic reminders that can be sent to all attendees at specified intervals before your Zoom webinar.
It could be 24 hours, an hour, or even 15 minutes prior.
These webinar reminder emails can be customized to include crucial information like the meeting agenda, specific topics to be discussed, or any preparatory materials that attendees might need to review.
Consider incorporating a request for confirmation or feedback in your reminders.
A simple prompt asking attendees to confirm their attendance or submit any questions they might have beforehand improves engagement and participation.
The 3 Levels of Zoom Automation
The steps we discussed above are for setting up a fully automatic Zoom webinar.
But when you integrate AEvent with Zoom, you can choose from 3 automation levels depending on your goals and preferences:
- Automatic
- Semi-automatic
- Manual
Automatic
This option automates the entire Zoom event.
AEvent logs into your Zoom account before the webinar begins and handles the screen/video sharing.
Your webinar will look and feel as though the presentation is happening live.
This level of automation requires no active participation from you or your team during the event, making it the most hands-off option available.
Semi-Automatic
The hybrid setting offers a blend of automated and manual control over the webinar.
Like the Automatic option, AEvent handles the initial setup and starts the video presentation on its own.
However, it introduces a unique feature called Manual Control Time.
This feature plays the entire pre-recorded webinar and then holds the last frame for a specified duration (X Minutes).
With this short pause, you can transition from automated content to a live segment, such as closing remarks or a Q&A session.
Manual
The Manual option gives complete control over the webinar to the presenter.
While AEvent still automates the timeline actions (likely pre-defined aspects like polls, chat messages, etc.), the presenter is responsible for managing the presentation and interaction with the audience.
This level offers the most personal touch and flexibility during the event.
Can Zoom Be Automated?
Yes, Zoom can be automated to streamline the meeting management process.
There are different ways to automate Zoom, such as scheduling recurring meetings and sending personalized and automatic reminders to participants.
However, this only works when you connect it AEvent – the only webinar automation platform that fully integrates with Zoom.
These methods reduce the manual effort in organizing and running meetings for a more efficient and error-free process.
Additionally, Zoom’s API allows for advanced custom automation, which can be tailored to specific organizational needs and workflows.
To connect Zoom with AEvent, read our guide here.
Does Zoom Have Automated Webinars?
Yes, Zoom has automated webinars when you integrate it with AEvent.
AEvent lets you schedule and run webinars with minimal manual intervention. You can upload your pre-recorded video straight on the platform and host it on Zoom to simulate a live event.
Features like attendee registration, email reminders, and follow-ups are also integral to Zoom webinars.
AEvent streamlines this process through automated pre-webinar and post-webinar email sequences that you can set up on your webinar timeline.
Automated Zoom elements help hosts focus on the content and engagement aspects of the webinar, rather than the administrative tasks.
Integrating Zoom with AEvent provides options for on-demand or evergreen webinars, where registered participants can view the webinar content at their convenience.
Automating Zoom Meetings with AEvent
Zoom’s versatile features offer a robust platform for running online events – from product demos to customer education and training.
However, to truly harness the full potential of your Zoom meetings, you need the right automation partner.
AEvent enhances Zoom’s capabilities, providing a seamless, end-to-end solution for automating your virtual events.
From personalized reminders to intricate scheduling and participant management, AEvent’s integration with Zoom creates a synergy that optimizes your virtual event planning and execution.
Ready to take your Zoom meetings to the next level?
Book a demo with AEvent today and explore how our solutions can streamline your virtual event management.