It’s no surprise that webinars are a priceless marketing tool. In fact, Seventy-three percent of marketers and sales leaders say they are the best way to get good leads.
But to get good leads, you have to make sure that people show up for your webinar.
AEvent’s integration with ClickFunnels helps you achieve just that.
In this article, you’ll learn how automation features in AEvent integrated with your ClickFunnels Pagebuilder can help get more people to watch your webinar and improve your show rates.
Ready to boost your webinar attendance and engagement?
Schedule your AEvent demo today to learn more about our platform’s features and how you can use them to double your webinar show rates.
How to Effectively Use Webinars for Lead Generation
Before you set up your webinar, it’s important to have a clear strategy for content creation and marketing. This way you can make sure your webinar connects with the right people and is more likely to be a success.
Here’s what to include in your webinar content and marketing checklist:
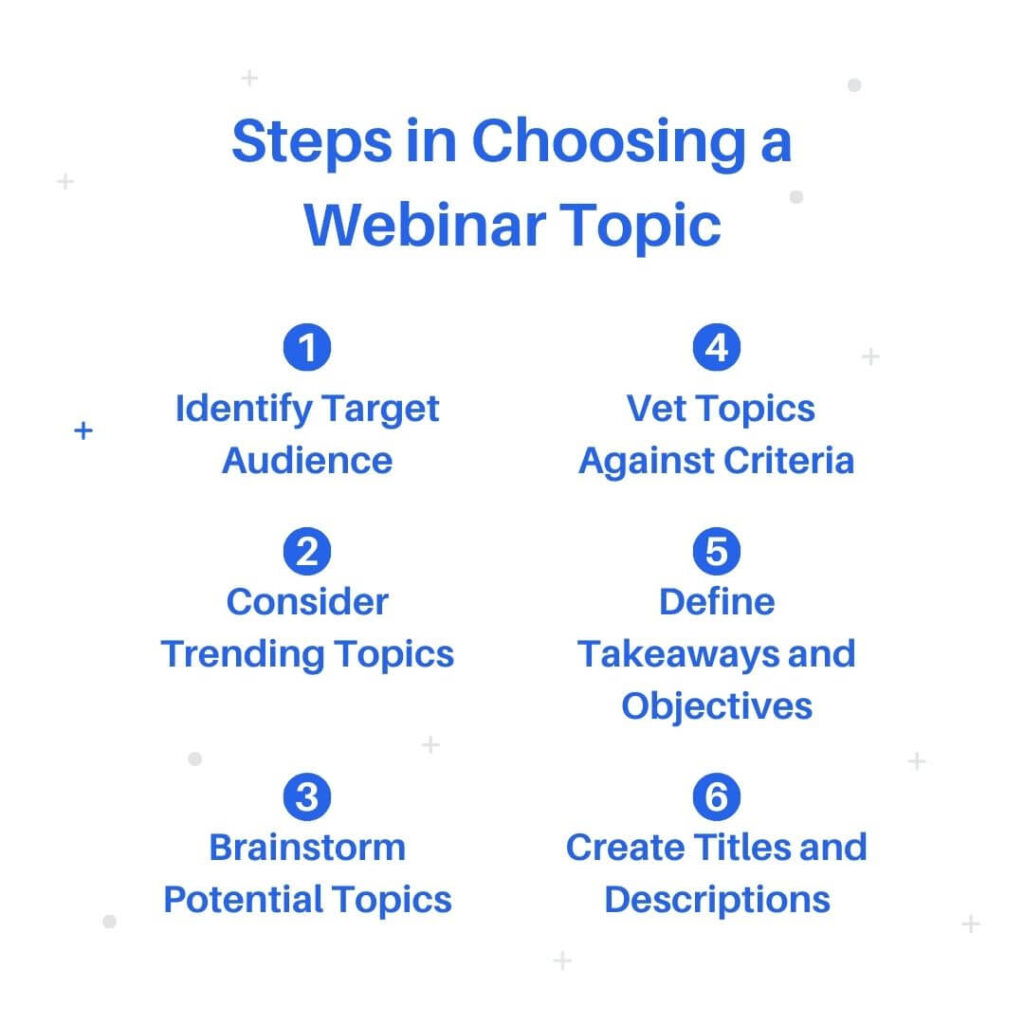
Choose a Topic Your Audience Can't Resist
| Steps in Choosing a Webinar Topic | What To Do: |
|---|---|
| 1. Identify Target Audience | Find out who your audience is and what they like. Use surveys and forums to learn about their interests. |
| 2. Consider Trending Topics | Look at current trends that match your audience's interests. Make sure the content connects well with current events. |
| 3. Brainstorm Potential Topics | Make a list of possible topics. |
| 4. Vet Topics Against Criteria | Ensure each topic is deep enough for a full webinar, appeals to your audience, fits your brand, and is educational and engaging. |
| 5. Define Takeaways and Objectives | Decide what your audience should learn and focus the webinar on these points. |
| 6. Create Titles and Descriptions | Write catchy titles and descriptions to attract attendees and show the webinar's benefits. |
Choosing a compelling webinar topic starts with understanding your audience’s interests and pain points.
Use surveys and online forums to learn what they want to know. Trending topics and current events can also make your content more relevant and interesting.
Brainstorm a variety of topics, then evaluate each for sufficient content (enough for 45-60 minutes), audience appeal, brand alignment, and potential to educate and engage.
After selecting a topic, outline clear takeaways and objectives to ensure the webinar provides real value. Craft engaging titles and descriptions to attract attendees and show why your webinar is a must-attend.
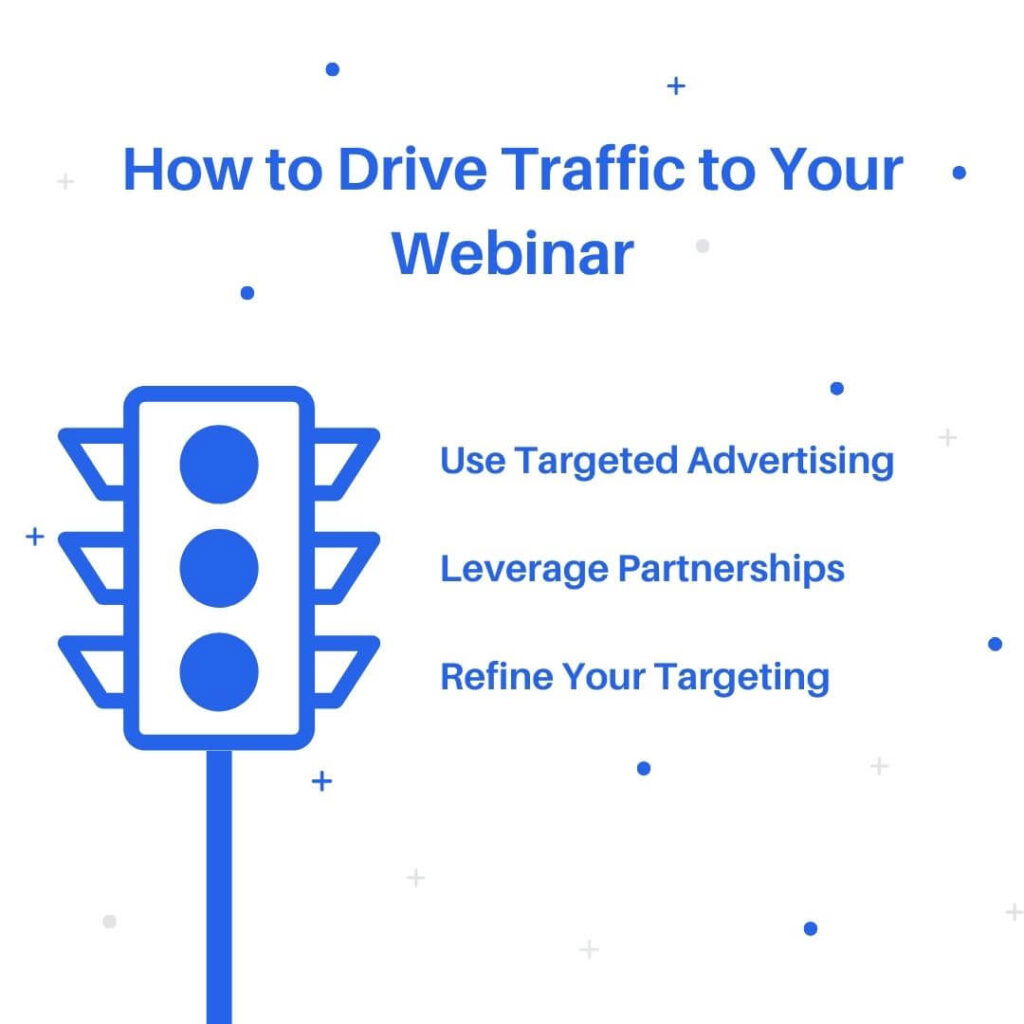
Identify Traffic Sources for Your Webinar
You can have the most valuable content for your webinar, but it won’t matter if no one attends.
This is why you need to think about where you can promote your webinar and ensure your room is filled with eager participants.
Use Targeted Advertising
Before launching any advertising campaigns, invest time in understanding your target audience deeply.
What are their demographics? What are their interests and pain points? The more you know, the better you can tailor your advertising.
Tailor your advertising to match their preferences and choose platforms that align with their habits, whether it’s Facebook, YouTube, LinkedIn, or others.
Leverage Partnerships
Collaborate with influencers or experts in your industry who have a significant following. Their endorsement can boost your webinar’s credibility and reach.
Explore partnerships with complementary businesses or organizations. They can help promote your webinar to their audience, and you can reciprocate the favor. It’s a win-win situation that expands your reach.
Refine Your Targeting
Use data analytics to refine your targeting. Analyze the performance of your ads and adjust your strategy accordingly. Identify which channels, ad types, and messaging resonate most with your audience.
Implement retargeting campaigns to re-engage with those who showed initial interest but didn’t register. Sometimes, it takes multiple touchpoints before someone commits to attending.
Build an Automated Webinar Funnel
| Key Points to Remember | What To Do |
|---|---|
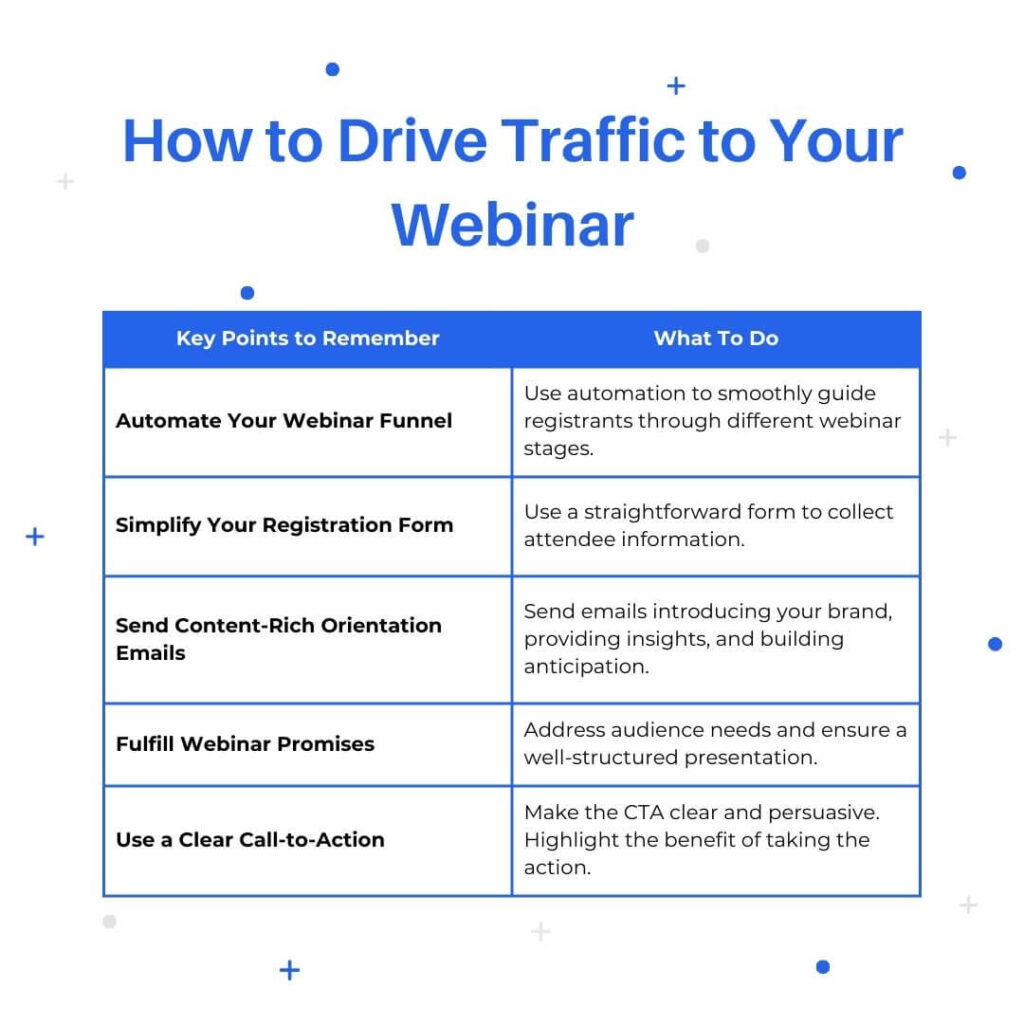
| Automate Your Webinar Funnel | Use automation to smoothly guide registrants through different webinar stages. |
| Simplify Your Registration Form | Use a straightforward form to collect attendee information. |
| Send Content-Rich Orientation Emails | Send emails introducing your brand, providing insights, and building anticipation. |
| Fulfill Webinar Promises | Address audience needs and ensure a well-structured presentation. |
| Use a Clear Call-to-Action | Make the CTA clear and persuasive. Highlight the benefit of taking the action. |
Building an automated webinar funnel involves a streamlined process that guides visitors seamlessly from registration to post-webinar follow-up.
The key is to minimize friction and emphasize value at every stage.
One way to do this is to simplify the registration process with a straightforward form to encourage sign-ups.
Once attendees register, don’t stop engaging with them; instead, send a series of content-rich orientation emails. These emails introduce your brand, offer valuable insights related to the webinar topic, and build anticipation using multimedia elements.
However, the core of your funnel lies in delivering a webinar that fulfills the promises made during registration and orientation.
Address your audience’s pain points, provide practical solutions, and ensure a well-structured presentation with valuable takeaways.
Finally, don’t forget the call-to-action (CTA) at the end of your webinar. Make the CTA clear and prominent, and use persuasive language to highlight the benefits of taking action, whether it’s making a purchase, signing up for a follow-up session, or accessing additional resources.
AEvent Key Features to Enhance Webinar Show Rates
Increasing your webinar show-up rate is critical for converting your audience. The more people who show up to your webinar, the higher your close rate.
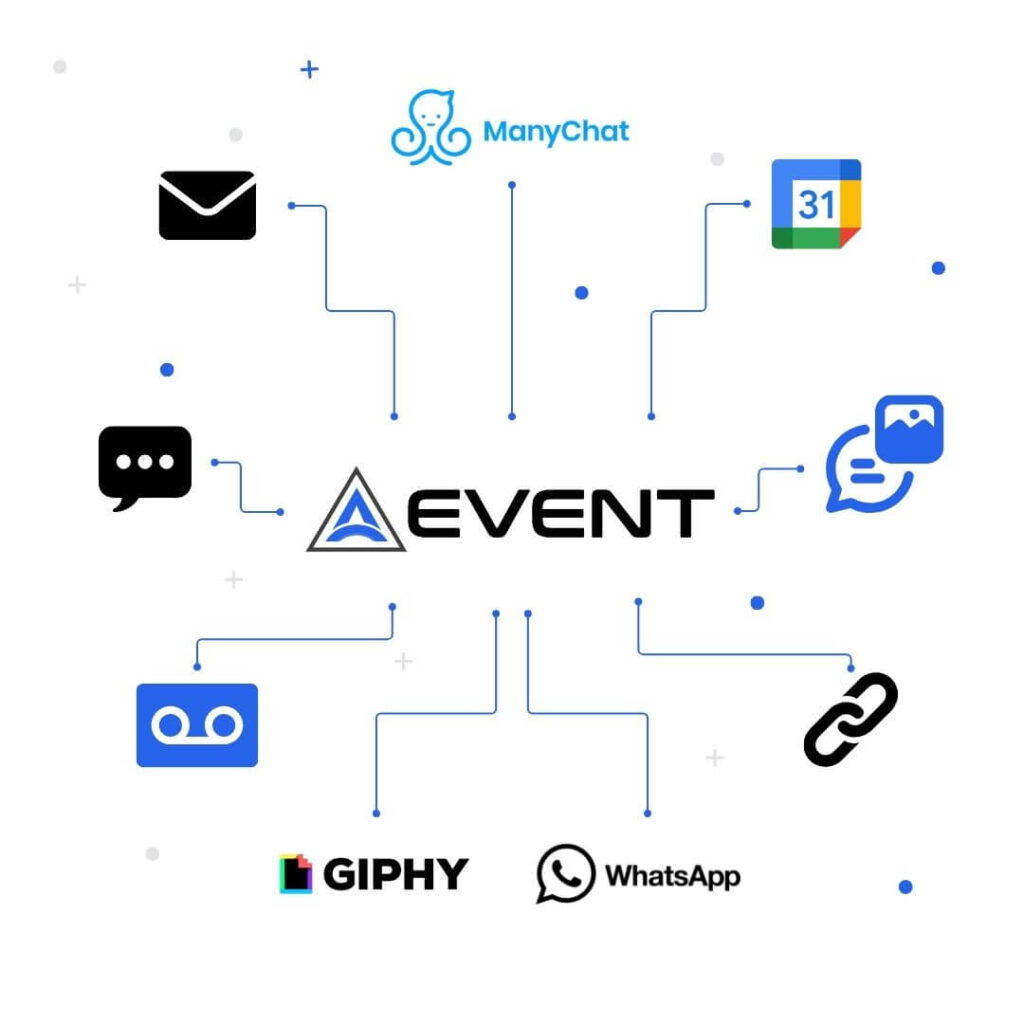
Let’s explore nine of the best features of AEvent that can help you maximize attendee turnout and engagement.
1. Email Automation
In 2022, around 50% of marketers doubled their ROI with email marketing.
These results show how important email campaigns are for webinar success.
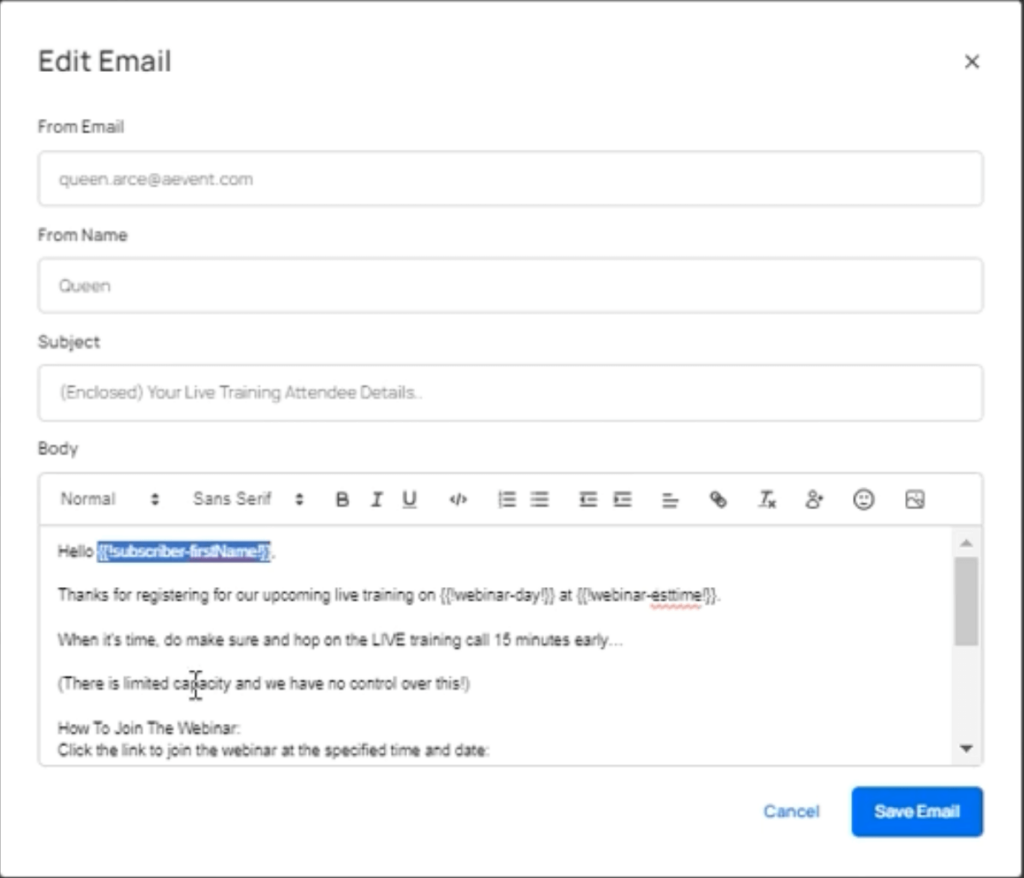
For your webinars, emails are also essential tools for communication and promotion. AEvent enables you to craft personalized and dynamic email sequences for both pre- and post-event communication, so you ensure maximum engagement and conversion.
2. SMS/MMS Messaging
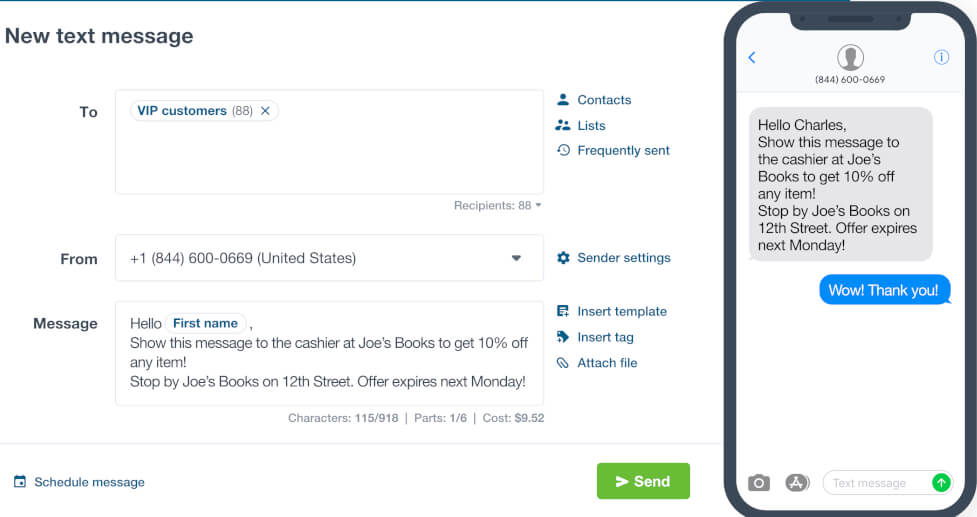
With an impressive 98% open rate for SMS, text messaging should be part of your webinar communication strategy.
AEvent’s SMS/MMS messaging capability lets you schedule text or multimedia messages in alignment with your email campaigns. This helps ensure that you message reaches its audience in the most direct way possible.
3. Giphy Integration
Adding a playful touch to your marketing, AEvent’s Giphy integration allows you to send fun and engaging gifs.
GIFs can significantly increase the engagement rate of your messages, making them more relatable and memorable.
With the power to convey emotions and concepts in a way that text alone cannot, GIFs add a dynamic and enjoyable dimension to your webinar communication.
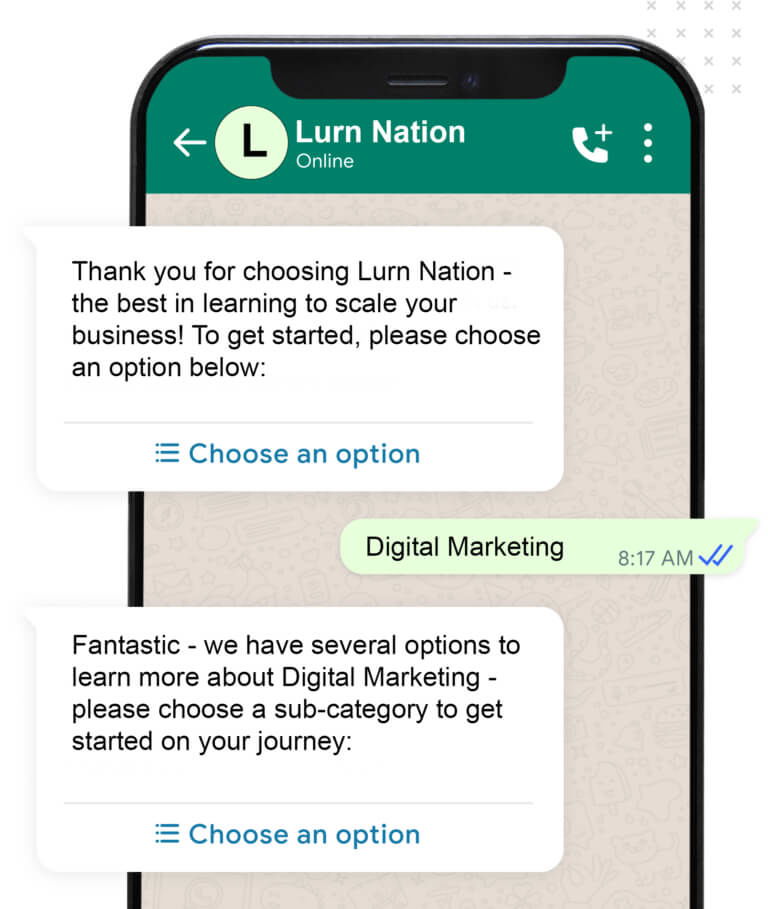
4. WhatsApp Integration
AEvent’s integration with WhatsApp is a game-changer for reaching international attendees. When you use WhatsApp for your webinar communication, you can expand your reach and connect with attendees globally on one of the most widely used messaging platforms.
With WhatsApp’s vast user base, you can engage with a broader and more diverse audience, ensuring that your webinar’s message resonates across different regions and cultures.
5. ManyChat Integration
For a comprehensive social media communication system, AEvent’s ManyChat integration connects all your accounts. This integration allows for a unified and consistent messaging strategy across platforms, ensuring that your webinar promotions are not only widespread but also cohesive.
ManyChat’s capabilities enable you to automate and personalize interactions, making your social media engagement more efficient and effective.
Here’s a video tutorial on how to integrate Manychat in AEvent:
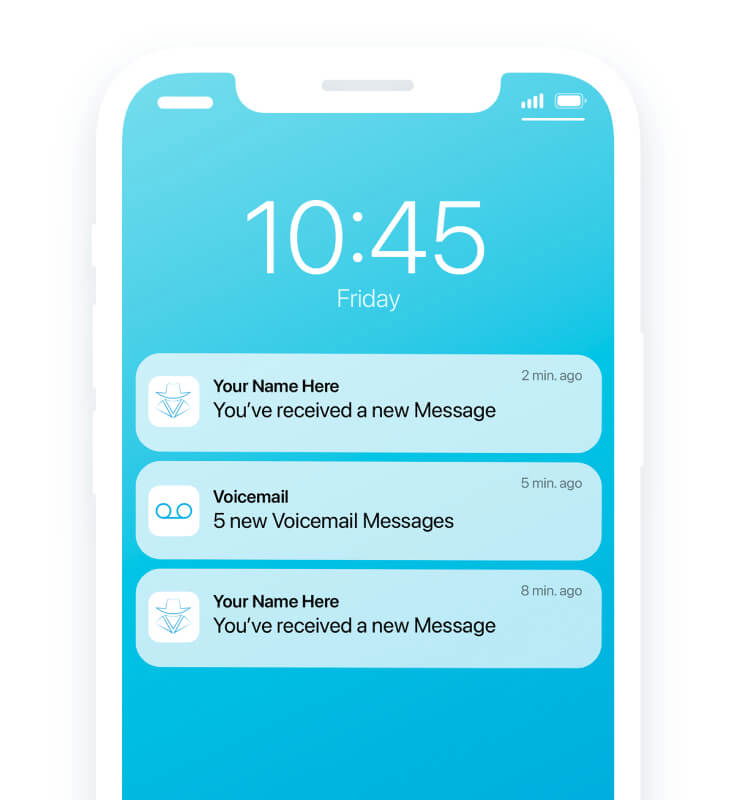
6. Ringless Voicemail
Ringless Voicemail is a unique feature that lets you leave personalized messages in your attendees’ voicemail boxes without making actual calls.
With this method, you can remind and engage your audience without the risk of intrusion. It’s especially effective for delivering last-minute reminders or exclusive offers, making sure your webinar stays top-of-mind without annoying your attendees.
7. Google Calendar Auto-Integration
The Google Calendar integration in AEvent automatically adds webinar events to your attendees’ calendars.
This feature eliminates the hassle of lost links or manual entry, ensuring your webinar is on their schedule. It’s a simple yet powerful tool for boosting attendance rates, as it helps reduce the chance of attendees forgetting or overlooking the event.
8. Personalized Messages + Images
Personalization is key in making attendees feel valued.
AEvent allows you to send personalized messages and images, which can be automatically created, adding a personal touch to your interactions and making each attendee feel uniquely attended to.
This level of customization can significantly increase engagement and loyalty, leading to higher webinar attendance and participation.
Watch how you can integrate AEvent with NiftyImages for more personalized webinars:
9. Evolving Personalized Links
Finally, AEvent offers personalized, custom links for each attendee.
These evolving links enhance the personal experience and also aid in tracking customer engagement across emails and texts while keeping your event secure from uninvited guests.
By simplifying the process of joining the webinar, attendees experience a seamless event from the start.

By leveraging these features of AEvent, you can significantly increase your webinar show-up rates and foster deeper connections with your audience.
Each feature is designed to ensure that your attendees are engaged, informed, and excited about your event, transforming them from mere registrants to active participants.
Now that you’re familiar with AEvent’s powerful features for webinars, let’s explore integrating with ClickFunnels.
Integrate ClickFunnels Pagebuilder with AEvent
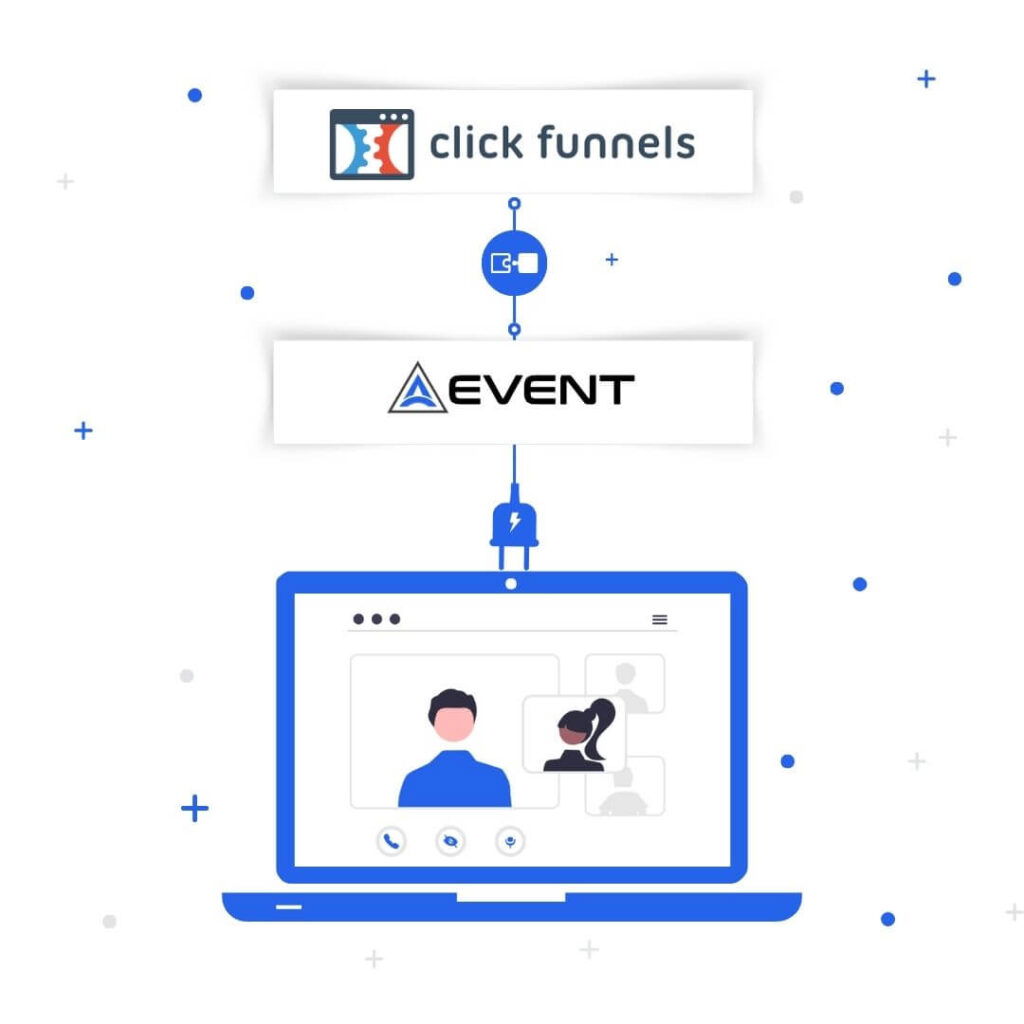
AEvent integrates seamlessly with ClickFunnels so you can run your webinar on autopilot. Host your registration, confirmation, calendar, and replay pages, and integrate them at a code level.
Don’t let the word “code” scare you away. The integration is designed to be easy!
Below, we’ll cover all the setup and integration steps, ensuring your pages look exactly as you intend.
Install AEvent Form Registration Code on Your ClickFunnels Registration Page
Following the steps below, you’ll be able to connect AEvent’s registration form with ClickFunnels.
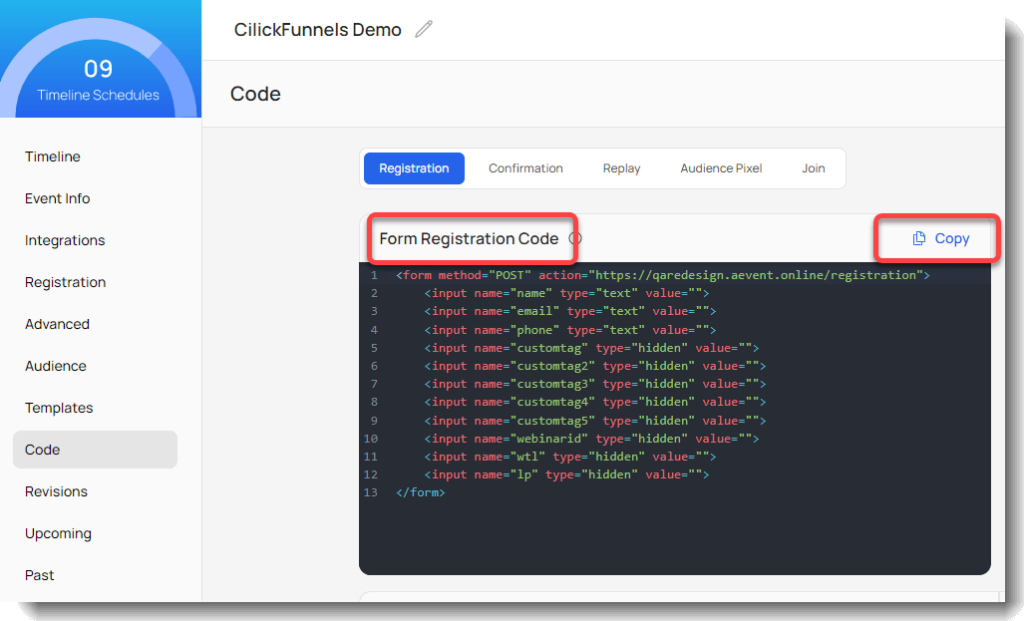
Step 1: Copy the AEvent Form Registration Code
- Navigate to the “Settings” of the timeline you’re using.
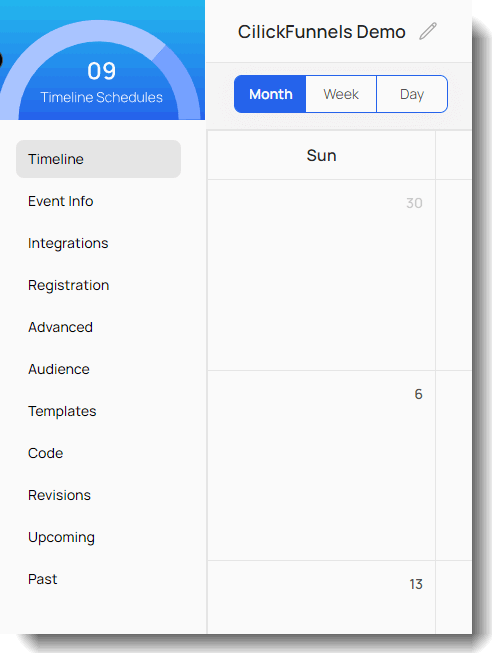
- Click on “Code” and make sure you’re on the “Registration” tab.
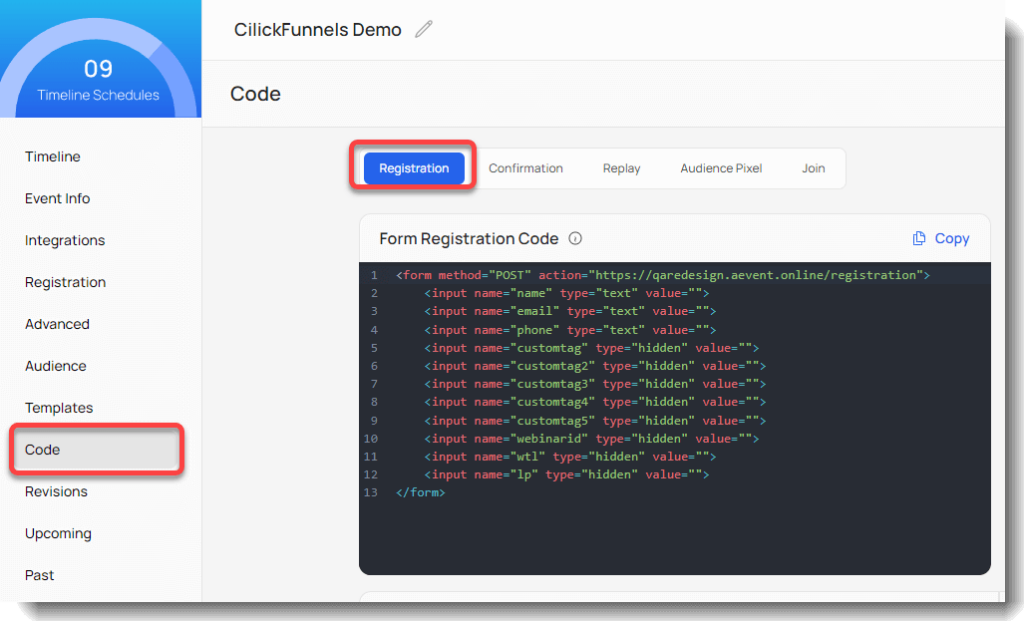
- Go to the “Form Registration Code” and copy it.
Step 2: Edit ClickFunnels Registration Page
- Open ClickFunnels and access the registration page you want to edit.
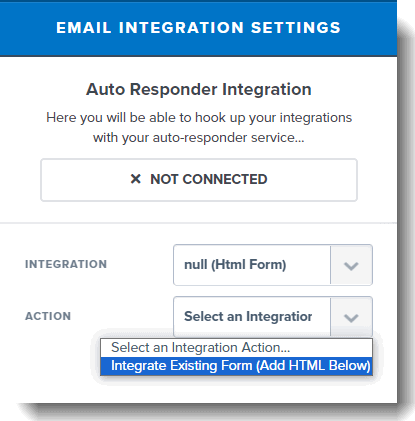
- Click on “Settings” and select “Integrations” from the list.

- For the “INTEGRATION” option, choose “null (HTML Form).”

- Then for “ACTION,” select “Integrate Existing Form (Add HTML Below)”.
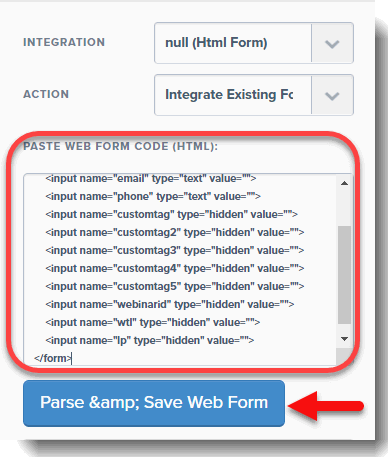
Step 3: Paste the AEvent Code in ClickFunnels
- Paste the previously copied Form Registration Code from AEvent into the provided field.
- Click on “Parse & Save Web Form.”
Step 4: Align Fields
- Align the name and email fields on the ClickFunnels page accordingly.
- If the form does not have the phone number, you do not need to connect that field.

- Make sure you save the page when you’re done.
And you’re done! You have connected the AEvent registration form to your ClickFunnels webinar page builder.
Integrate AEvent 'Add To Calendar' Integration Into Your ClickFunnels Page
Integrate the “Add to Calendar” feature on your ClickFunnels page to let users easily add your event to popular calendars like Google Calendar, iCloud, and Outlook. This not only boosts attendance and engagement but also helps users stay organized.
This tutorial guides you through adding a button for this feature, making it simple for users to include your event in their calendars.
“Add to Calendar” Integration
- Click on “Add New Element” on the ClickFunnels confirmation page.
- Click on the MISC on the right menu and select “Custom JS/HTML.
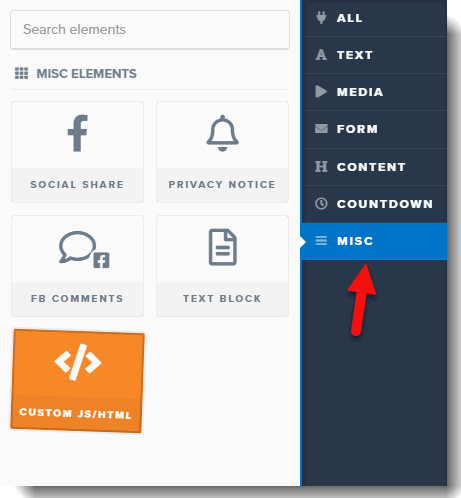
- Click on Open Code Editor

Return to AEvent and activate the “Add to Calendar” integration if not already done.
- Customize the Calendar reminder icon by selecting one from the options.
- Copy the HTML code for the “Add to Calendar” reminder.
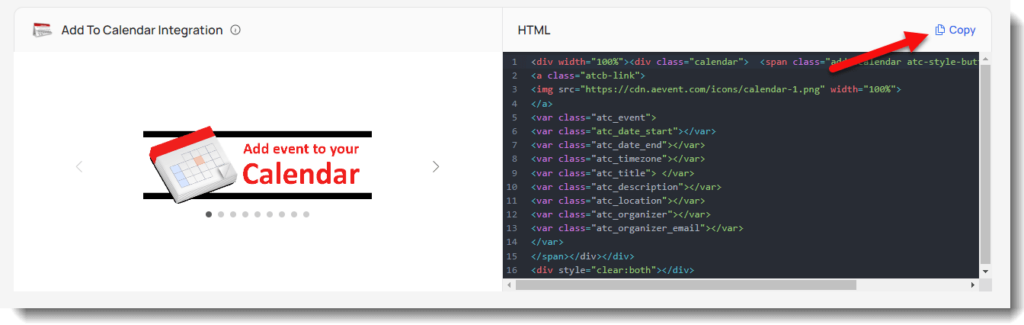
- Paste the HTML code into the ClickFunnels code editor.
- Save the changes.
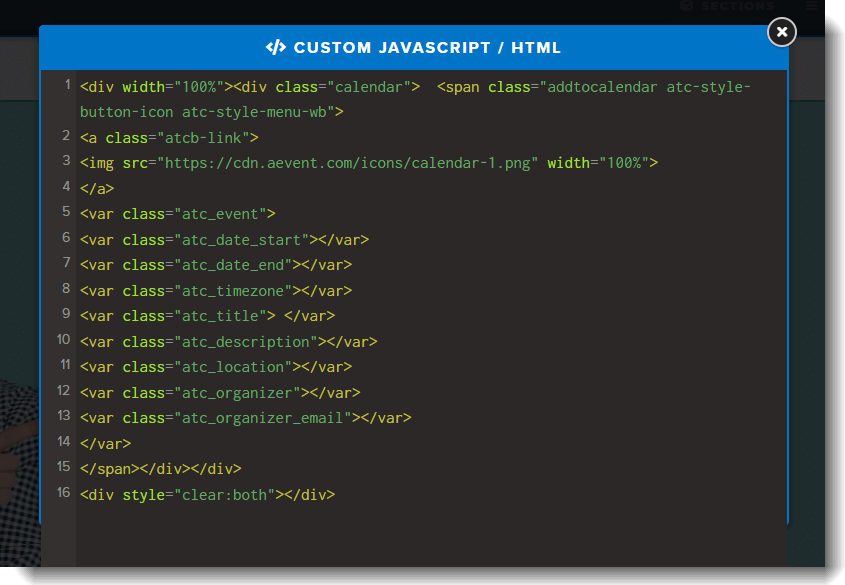
PRO TIP: You can add any image to your Calendar by changing this code once pasted in ClickFunnels. If you change out the “img src” section in the screenshot above with your image, you can use any icon of your choice.

Remember to test the button in ‘preview’ mode to ensure it functions as intended.
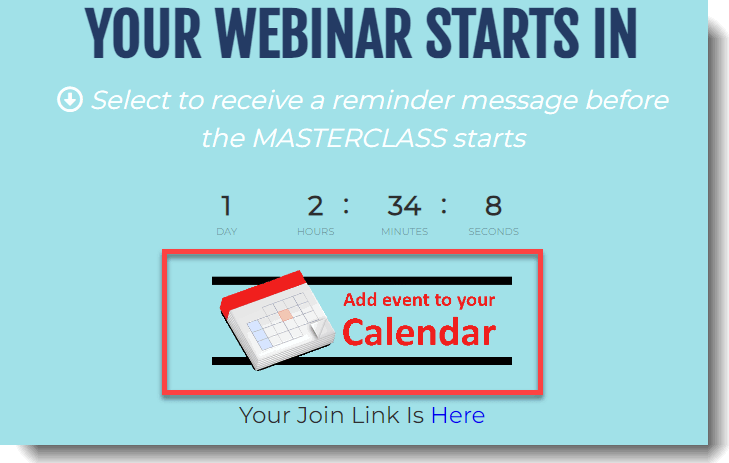
You’ve successfully added the “Add to Calendar” feature to your ClickFunnels page.
This allows registered users to conveniently add your event to their favorite calendars, enhancing engagement and boosting attendance.
Integrate AEvent with Your ClickFunnels Replay Page
This tutorial will guide you on integrating AEvent with your ClickFunnels Replay Page, enabling you to create automated, self-expiring replay pages for secure, authorized access.
You’ll learn to integrate the AEvent header script, customize countdown timers, manage the visibility of elements, and establish self-expiring links for protected content access.
Step 1: AEvent Header Script
- Open AEvent and go to the timeline you’re going to connect to your ClickFunnels Replay page.
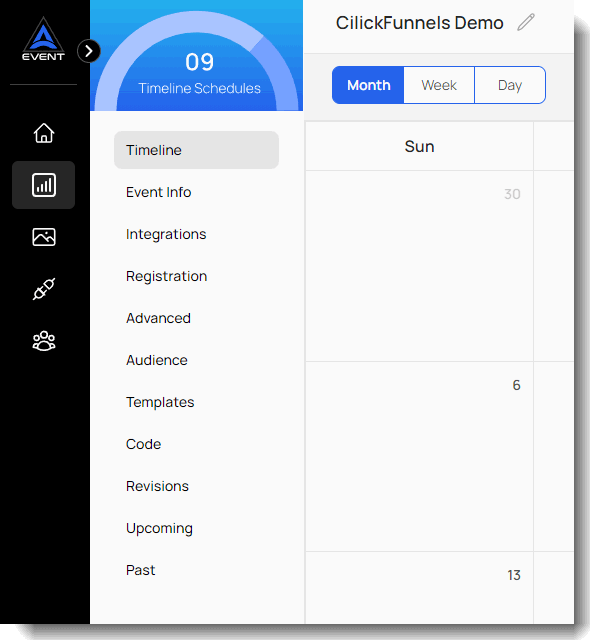
- On the Settings Menu on the left select Code.
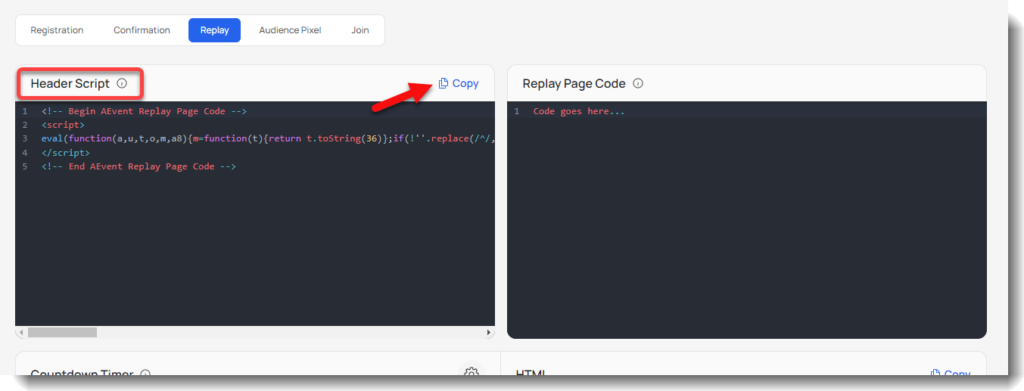
- Make sure you are on the Replay Tab.

- Copy the Header Script
Step 2: Add Script to ClickFunnels
- Open the Clickfunnels Replay Page if you want to add the Header Script.
- Select Settings and select Tracking Code.
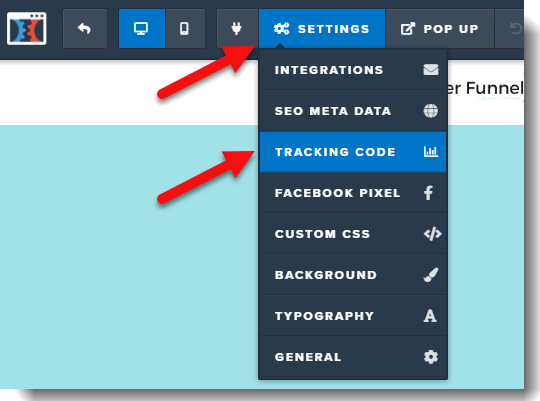
- In the popup, paste the AEvent Header Code you copied in the last step.

- Close the window and save the step.
BONUS STEP: Add a Countdown Timer that is in line with the Expiration of the replay.
You can use the timer in ClickFunnels, but you need to adjust two settings for it to work properly.
- Locate the countdown timer on your ClickFunnels Replay Page.
- Open the setting of the timer.

- YOU MUST change these two settings when using the Date Countdown 2.0.
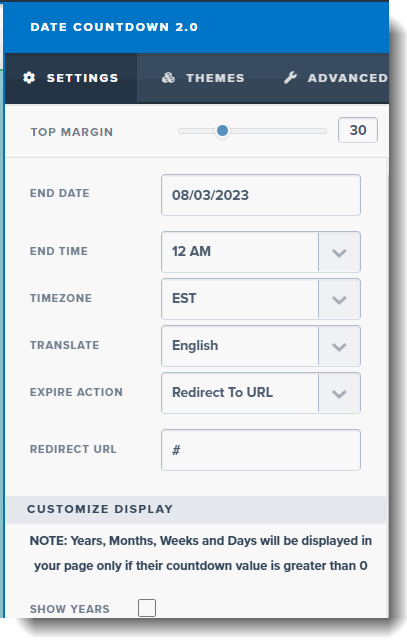
- Set the “End Date” to zero.
- Change the “Expire Action” to “Show and Hide Elements.”
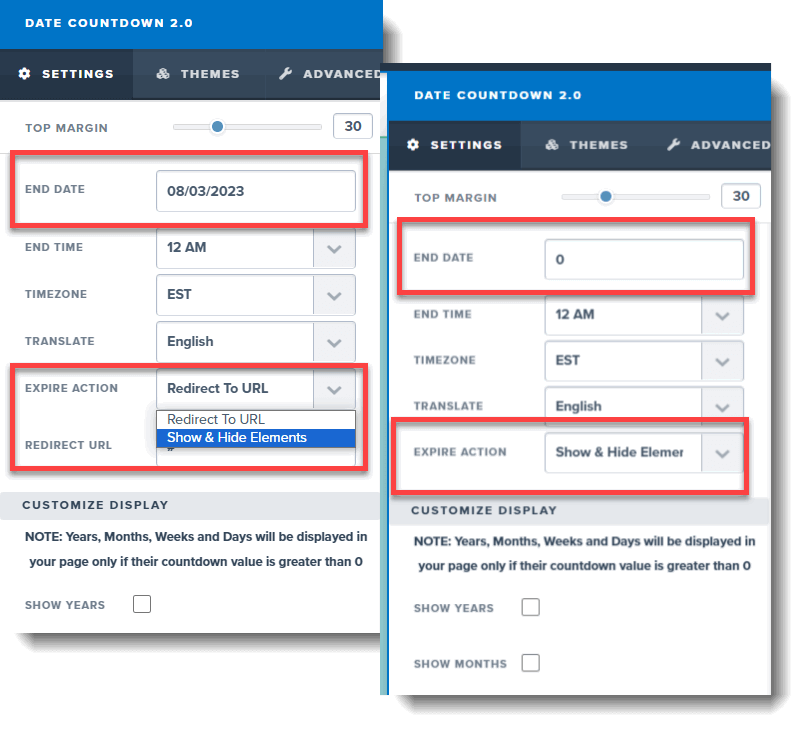
- For the “Minute Countdown (Evergreen),” you want to set the Hours, Minutes, and Seconds to Zero and change the “Expire Action” to “Show and Hide Elements.”
IMPORTANT: Secure Access with Self-Expiring Link
When the script is in place, and the timeline is set to active, accessing the replay page without proper credentials is restricted.
The credentials usually consist of a registration link or replay link that is valid for a specific time. These self-expiring links ensure that unauthorized users are locked out after the designated period.
To test the functionality, link must either have a Webinar ID or Registrant ID, as shown below:
https://YOUR_REPLAY_PAGE_LINK?webinar=XXXXXXX
or
https://YOUR_REPLAY_PAGE_LINK?r=XXXXXX
If you want to make the replay page accessible without time restrictions, you can set the timeline to inactive.
However, keep in mind that once the timeline is inactive, anyone can access the content.
The self-expiring feature is designed to create a sense of urgency and offer true automation for your replay pages.
Great work! You’ve successfully enhanced your ClickFunnels replay pages by learning to add the header script, customize countdown timers, and secure content with self-expiring links. These steps enable you to craft engaging, automatically controlled replay pages.
Increase Your Show Rates with AEvent+ClickFunnels Webinar
The key to successful webinar marketing lies in effective communication and engagement, and the combination of AEvent and ClickFunnels provides you with the tools to achieve just that.
By utilizing features such as Ringless Voicemail, Google Calendar Auto-Integration, personalized messaging, and self-expiring links, you create an environment where attendees are more likely to engage and participate.
Whether you’re looking to increase attendance rates, enhance user experience, or secure your content, the integration between AEvent and ClickFunnels empowers you to reach your webinar goals with greater efficiency and impact.
Ready to boost your webinar attendance and engagement?
Schedule your AEvent demo today to learn more about our platform’s features and how you can use them to double your webinar show rates.